CityDashBoard TalesofThings MapTube
Qrator Tutorials About Digital Urban
MRes ASAV SurveyMapper Contact Us
Showing posts with label N95. Show all posts

2008-04-03

Live Geo-Located Video Feeds in Google Earth/Maps: Seero

The revolution in geo-location is continuing apace with video content combined with GPS location and live streaming making it the latest 'must have' on the block from the people at Seero.

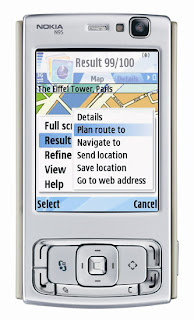
Gadgets such as the Nokia N95 are ripe for such content being able to stream video live (more on that in a future post), track the location and send data to a server all at the same time.

Seero breaks new ground by being the first platform to allow its users to broadcast live and
on-location through Google Earth. Viewers can load Seero's global KML feed in GEarth and see
the GPS positioning of each broadcaster along with their live video feed.
Justin Cutillo, Seero's CEO, describes the new feature: "the end goal is to utilize Google Earth and Seero's broadcasting platform to create an accurate and dynamic representation of what's happening in the world and where it's taking place."

It really is one of the moments that you have to take a look at the demo, sit back and then think how amazing is the ability to stream your location, video and sound live to a blog, Google Map or Google Earth.

New releases tend to wash over us at times but this is one to watch. If our N95 had unlimited data we would be streaming our route home on the 24 bus to Camden Town (just because we could) but sadly in the UK at least mobile Internet is still expensive so a lot of N95 users have made the leap to iPhones due to unlimited data being part of the package.

View the demo.

2008-01-27

Nokia N95 as a 3G Modem on a Mac: Connected outside of the City

When we leave the city and the safety of an almost constant connection to the Internet there are times when we need to check our email, run a blog post or just catch up with some work.

Having experienced some time out of town this weekend we still needed to be in touch with the outside server world and so turned to our trusty Nokia N95 and its built in 3G modem.

We have been Mac users now for a month, having finally jumped ship from windows after 10 years as a result one to many Vista nightmares. Set up was surprisingly easy with us connecting to the Internet via our N95 and Vodafone in under 5 minutes.

All that is needed is a quick trip to the Nokia page for the isync plugin and then the simple question of enabling bluetooth on both the N95 and the Mac.

Running through 'Set Up Bluetooth Device' was straightforward with a screen requesting user name and password for our carrier - in our case Vodafone. We picked up the details from Ross Barkmen's GPRS Info Page which carries usernames and passwords for most services providers around the world.

With the password in place it was simply a case of opening our network preferences and connecting via Bluetooth.

It enabled us to post a couple of entries today and finally feel connected regardless of location. All we need do now is move from Vodafone who allow (in their words) a 'massive 120mb per month' of data to T Mobiles unlimited Web 'n' Walk that seems to be getting all the hype recently.

2007-11-19

Google Earth PhotoOverlay with Hotspots

Stefan Geens of the Ogle Earth Blog has put up an interesting post which in part uses our labs Google Earth PhotoOverlay Creator to good effect for archaeological dig visualisation.

It is well worth taking a look at Stefans' post as he has integrated other photographs into the panorama, creating an interesting use of photooverlay and Google Earth. Indeed in this instance Google Earth becomes more of a general visualisation platform, something that you may of seen in VRML or such like a few years ago.

View Stefans Post - of note is the panorama created using his Nokia (we assume N95?)

Download PhotoOverlay Creator and view the Tutorial.

How to Stitch a Panorama with the Nokia N95

2007-09-18

Top 5 Urban Gadgets and Software

This blog is all about capturing the urban realm via low end digital means. As such over the years we have relied on various gadgets, software and pieces of kit which make the job easier.

In our view the 5 essential items for capturing and visualising the urban environment are:

Number 1: Nokia N95

Despite a few issues with battery life the integrated GPS, 5 mega pixel camera and ability to upload geo-tagged images directly to services such as Flickr make the Nokia N95 an all round essential tool.

The camera's quality to high enough for photomodelling in SketchUp and the addition of the admittedly slow to get a fix GPS is adequate for geo-locating. Stick it to a kite and you have instant aerial photography, or rotate around a single spot for a high resolution panorama (see our tutorial).

All in all the N95 does it all although in rapidly moving times the interface is slightly clunky and it could well be soon knocked off the list with up and coming models.

Number 2: Google Earth\Google Maps

To have essentially free software in at number 2 is quite an achievement. Google Earth and Google Maps have changed the way in which we share and communicate geographic information, the ability to tag data, upload images and import 3D models in the case of Google Earth into a common environment on a global scale is amazingly something we now almost take for granted.

The simple fact is that if you want to share geographic information at this time and point it has to be in Google Earth or Google Maps - see our Working Paper for tools and methods to import and visualise data.

Number 3: The Nodal Ninja

The Nodal Ninja is perhaps slightly unknown outside of the panoramic photography industry but it is an essential item. Priced at $229 the Nodal Ninja is one of the cheapest yet most versatile camera mounts.

The important point with capturing either Giga Pixel images or panoramic 360x180 scenes is to ensure that the camera rotates around a single nodal point. The Nodal Ninja works with the majority of cameras, allowing you to switch between high resolution images for professional capture or a light weight point and shoot camera for off the cuff shots.

Central to its position at number 3 is its light weight, we have used a number of panoramic heads in our time and carrying them around town is often hard work. With the Nodel Ninja it is easy to transport and as such should be part of the regular kit when capturing any urban images.


Number 4: The Power Monkey Explorer

The Power Monkey is a portable power charger than can extend your Nokia N95's life by up to 4 times. Portable and light weight the main unit can be charged up either via the supplied Solar Slave or via a USB cable if you don't have access to a mains outlet.

Supplied with a number of sockets to fit and power gadgets from digital cameras to Ipods and phones it finally means that you wont be out and about only to find you have run out of power.

We will have a full review of the Power Monkey Explorer in the next few days...

Number 5: Google SketchUp

Google products feature three times in this simple top 5 list, Google have changed the way in which we work and in a 3D concept Google SketchUp is a leader in its field. Again available free of charge unless you require higher end import and export options SketchUp is one of the most enjoyable pieces of software to use. The ability to simply load in your images and trace over them to create photorealistic models is something that used to be limited to high end photogrammetric software.

We know that there are users our there that view SketchUp as a tool for the masses and frown upon its simple tool set and interface. Yet this is what its all about, mass participation in modeling and geographic information using simple to use yet powerful toolsets.

In essence this is the start of a longer list of recommend hardware and software of note is our lack of mention of ESRI, 3D Max, Laser Scanners or other high end software/hardware.

The market is changing and with it both the software and levels of hardware required, to be continued..

2007-07-23

Nokia N95 Kite Aerial Photography

Looking at the kite in the corner of the office we started thinking about using it to grab some geotagged images from our N95. A quick google search later however shows that we have been well and truly beaten to it - there are a number of examples out there ranging from attaching a N95 to a remote control plane to the more traditional kite aerial photography.

Scott Janousek has posted a video online of his attempts to attach his N95 to a kite using duct tape:


The N95 has built in GPS - if you then link the GPS with its 5 mega pixel camera in timelapse mode it holds the possibility of good quality aerial imagery.

See Scotts site for more info on his kite flying and Pictearth for advanced image acquisition using lightweight, easy to use UAV, GPS, high resolution sensor, live communication and Pict'Earth software.

Sometime during the week we may try flying a kite in Regents Park, London so if you see someone duct taping their phone to a kite it'll be us...

2007-05-01

How to Stitch a Panorama with the Nokia N95


Taking panoramas used to be an art form that took a lot of knowledge, a lot of heavy hardware and the semi-manual placement of control points in complicated software. To some extent this still stands true but with the advent of 5 mega pixel cameras on phones such as the Nokia N95 it is now possible to get good results with free software and a bit of patience.

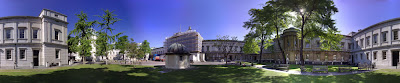
Below is an example panorama captured using the Nokia N95, displayed using Image Cutter and Google Maps:


Click and drag to pan/scroll wheel or double click to zoom in and out of the image. You can also view the above image full screen.

To take your own Nokia N95 panoramas simply work your way through these easy to follow steps:

Capturing

1) Set up your N95 to capture images at the highest resolution - 5 mega pixels.

2) Choose 'Landscape' under Scene Mode for the images, this ensures a constant focus throughout the capture process.

3) Stand in your location with the camera roughly at arms length and take your first image.

4) The secret to a good panorama is trying to firstly make sure the nodal point (lens) is kept central for each of the images and secondly that there is a 20% overlap with each shot. As such the aim is to make the camera the point of rotation and move round taking your second image so it overlaps the first one - as our first four images below illustrate:

5) Carry on working your way around the scene until you are back where you started, you should take approximately 14 images for a complete circle.

6) To increase the field of view of your panorama - ie to include more of the ground or the sky/close by buildings - simply tilt the N95 upwards or downloads accordingly and go around again. Pictured below is a section of our second round of images to fit in the buildings roof.


That's it, the image capturing process should take approximately 5 minutes.

Stitching

We have used the freely available 'Auto Stitch' software to merge the panorama, simply because higher end solutions such as Real Viz's Stitcher hung at 99% on each of our test runs. Stitcher, when it works, will provide a better blend of colours but Auto Stitch is free, quick and simple.

1) Download Auto Stitch and install it on your machine.

2) Run Auto Stitch and choose File/Open - then select all of your images. This will run a quick low resolution test stitch to ensure the images align. Once you are happy that the panorama has worked go to Edit/Options and set scale to 100%. Reopen your images and sit back and wait, a typical stitch will take approximately an hour on a recent spec pc.

You should now have a completed panorama taken using your N95 - our test scene resulted in a 40Mb Jpeg at 18100x3766.

You can also use the N95 GPS functionality to link the image to Google Maps/Flickr - see our N95 Geo Image Tagging Tutorial.

Let us know if you create any of your own panoramas....

Coming Soon - Creating a Panorama with the N95

We are just putting together a 'How to' on creating a panoramic image with the Nokia N95. The results are surprisingly good with the final image coming in at 15616x7808 pixels.


Its going to take overnight to process the image, the tutorial is written and as soon as our Image Cutter viewer is in place to view the full resolution output we will publish our 'How to' on creating panoramas with the N95.

2007-04-26

How to Geotag Photographs on the Nokia N95 for Google My Maps and Flickr


Its taken a bit of time to work this one out but with a few simple steps you can capture geotagged photographs on your Nokia N95, upload to Flickr and then add them to Google's My Maps.

The process is simple:

Initial Set Up

1) First off go to ShoZu.com - Shozu is freely available software that allows you to both geotag photographs on your N95 and upload to a number of online services, in our case Flickr.

Sign up with the site and select the Nokia N93 as your phone (the N95 is not yet listed). You will be asked to set up a user name and password as well as your mobile number. Once registered ShoZu will send a text along with a link to download the software. We downloaded via a Wi-Fi link to make sure we didn't incur any phone charges;

2) Install ShoZu on your N95 and login to your account using the username and password you set up. This will authenticate your account allowing you to log back into the web based service and set up a number of destinations to upload your photographs;

3) To enable uploading to Flickr go to the web page and selecting the 'Share It' tag. Now simply go through the process of allowing ShoZu the required rights to upload to your account.

This completes the set up ShoZu in terms of services, we now simply need to turn on GPS tagging;

4) Open ShoZu on your N95 and go to: Options/View and then the images tag which is indicated by a film strip icon. The 4th option is GPS Tagging, switch this to On.

Capturing and Uploading

1) Open either Nokias 'Maps' or the 'Sports Tracker' application and make sure you are getting a GPS fix, we use Sports Tracker as it allows us to additionally upload our route to Google Earth/Maps;

2) Start taking your pictures, with ShoZu installed each photograph will have a location tag written into its EXIF information.

3) Open ShoZu and select Share-It/All files, this will display a list of your photographs. Select the image your want to upload and click Options, this displays the choice to Send to Flickr. Select send and your image will be uploaded, again we uploaded via Wi-Fi to minimise any data charges.


Your images will now be available on your Flickr page and automatically geotagged. Within Flickr you can choose to view by map which opens a Yahoo Map page, we prefer Googles My Maps options:


1) At the bottom of your Flickr Photos page you will see a RSS Feed Icon and the Feed link - Right click on this link and copy the link location;

2) Login into your Google Maps account and paste the feed location into the search box - now add the following to the end of the paste '&georss=true' (without the ')

3) Running the search will display your photographs from the N95 on Google Maps via Flickr, to add them to My Maps simple click on each icon and choose 'Save to My Maps'

You can view our geotagged images from the Nokia N95 on our My Maps page.

2007-04-15

Nokia N95 Tracking from San Francisco to Santa Barbara

We have run a couple of posts recently on the GPS functionality of the Nokia N95, most notably using the Sports Tracker application to track a train in London. We continue this theme, this time tracking our 5 hour drive from San Francisco to Santa Barbara, California.

The interesting issues here are firstly the time covered - 5 hours - presenting an interesting spatial/temporal visualisation and secondly the fact that Sports Tracker was used at the same time as the general mapping application.

Previously we had used Sports Tracker as the main application, thus losing the ability to navigate as the tracker does not yet include a general map overview. To solve this you can set Sports Tracker running and then continue to use the phone for any other use, in our case general GPS navigation.

The ability to run tracker in the background means that you can view the map secure in the knowledge that your speed and route is being logged for later visualisation in Google Earth.

With a top speed of 137km/h and covering 508km you can view our entire route in Google Earth

2007-04-10

Nokia N95 GPS Google Earth - Tracking a Train

In a follow up to yesterday's post, on the Nokia N95's built in GPS and creating GPS track for visualisation in Google Earth, we thought we would try it out on the train back to Central London.

To be honest we didn't think it would work but as we switched on the GPS, while leaving Wokingham Station in Berkshire, the N95 picked up 6 satellites and displayed our location and speed in realtime. Due to the length of the journey we were not prepared to hold the phone next to the window the whole way so it sat on the seat while playing MP3's and tracking the route.

It performed surprisingly well, only losing the signal at one station which was undercover. While the speed of the train is not something we normally take a great deal of interest in, to see it displayed in realtime is oddly fascinating.


Once the journey was complete we uploaded the route into Google Earth and this time used the altitude of the route to portray speed. This creates an impressive Google Earth path and considering that the phone was merely placed on the seat, rather than near a window, one with a high level of accuracy.

Thanks to the N95 i am now also in possession of some great facts about trains - did you know that on the Wokingham to London Waterloo line the average speed is 60.3km/h or that the maximum speed is 120km/h .........

You can view our path in Google Earth here.

See also iPhone 3G, InstaMapper App and Google Earth: Tracking the Thames Clipper

2007-04-09

Nokia N95 GPS Tracking/Google Earth

We went into Vodafone a couple of days ago after our old Sony phone finally gave up the ghost and came out with a Nokia N95. The N95 has been reviewed on many sites for its various multi-media/wi-fi/photographic abilities but what opened up our thoughts to move over to a Nokia was the built in GPS.

If you own a N95 one of the first things you should do is download the recently released free application 'Sports Tracker' from Nokia. Sports Tracker is aimed at the sports or general user on foot or cycling and more importantly it provides full route tracking with the ability to upload to Google Earth.

The ability to create tracks for Google Earth/Maps in a small portable portable phone is impressive. On our first test run we used the Sports Tracker application on a drive across Berkshire (its meant to be used for running or cycling but it does the same job in a car). The N95 performed well considering it was placed well inside the car, rather than on the windscreen as with most in-car GPS systems. After you have reached your destination you can simply choose to 'Save as Google Earth' and then transfer to your PC.


Once in Google Earth a variety of information points are provided on your travel speed as well as your highest and lowest altitudes. We have only touched on the basic level of functionality here but the N95 GPS comes highly recommended, it is definitely a step forward in Google Earth tracking for the general consumer.

Take a look at our track in Google Earth

See also iPhone 3G, InstaMapper App and Google Earth: Tracking the Thames Clipper